Cleaning the garden plot usually takes place in the fall, but for some reason, gardeners may postpone it until spring. The new garden season in some regions opens when the snow has not completely thawed. At this time, planting is out of the question, but you can do the delayed preparation of the greenhouse for the new planting season.
When to start preparing the greenhouse for the new season
Experienced gardeners always prepare the greenhouse for the new season in the fall: they collect the remains of garbage, disinfect and lay new beds.
In the spring, their work in this direction will consist only in washing the structure and the final formation of the beds.
But some gardeners postpone the preparation of greenhouses for the spring, which is not very convenient – you have to warm up the ground to start working with it. You can start preparatory work with the arrival of the first warm days.
Gardeners who have completely postponed the cleaning of the greenhouse in the spring should start it as early as possible in order to be in time for planting seedlings in a permanent place.
How to treat a greenhouse from pests and diseases in stages
Disinfection of the greenhouse is a very important event that will finally get rid of all overwintered pests and pathogens.
Disinfection of the structure is carried out in 3 stages:
- training;
- washing;
- repair and replacement of all parts broken during the winter;
- disinfection;
- tillage and preparation of planting beds.
Each of these stages consists of many nuances, so it is worth considering each in more detail.
Prepare
Preparing the greenhouse for processing consists in removing all plant debris, garter twine and other debris from the previous season from it.
Some mistakenly believe that old leaves will serve as excellent fertilizer, however, in practice, they turn out to be a good winter refuge for harmful microorganisms and insects.
All garbage is taken out as far as possible from the site or immediately burned.
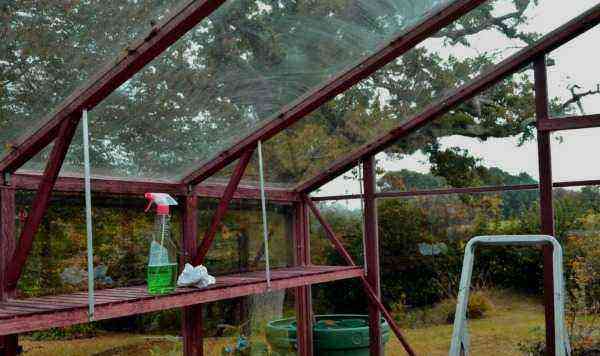
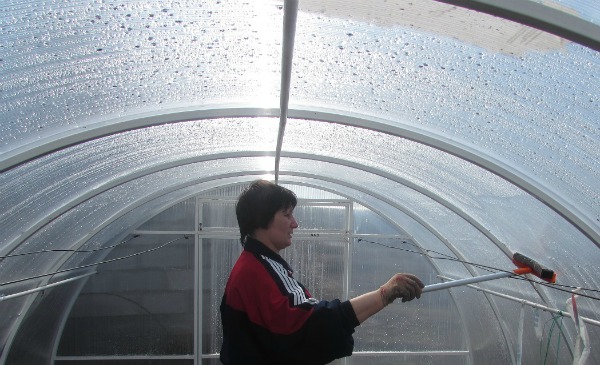
Washing construction
Disinfection of the greenhouse begins with washing the walls of the structure from the inside with special solutions. If there are hoses in the greenhouse, for example, for drip irrigation, they must also be thoroughly rinsed.
Depending on the material of construction, a suitable cleaning solution must be selected.
- For film and glass greenhouses, ordinary soapy water is used. All metal areas are washed with an acetic solution diluted in hot water.
- Polycarbonate can also be washed with soap, but a pale pink, weak solution of potassium permanganate is considered the most effective in this case.
The brush or sponge for washing polycarbonate should be soft. Do not use hard metal sponges and cleaning solutions with abrasive insoluble particles. Polycarbonate is easy to scratch, so only soft sponges and rags should be used to preserve the surface of the material.
After washing, the greenhouse is opened for airing and drying: open the door and all the windows.
Structure repair
During washing, in parallel, a careful inspection of the structure is carried out for damage, as well as a strength check of all supporting elements, joints and joints. If rusty elements, areas with corrosion are found, they must be replaced.
If cracks, holes are found in the material of the structure, then this section of the material is also replaced. The cracked glass is removed and a new one is inserted, the hole in the film, depending on its size, is sealed with adhesive tape or covered with a piece of material, the darkened polycarbonate is replaced with a new sheet.
If there is a lot of snow in the region during the winter, the greenhouse can “sag” under its weight. Therefore, sometimes in the spring it is necessary to align the walls and frame of the structure.
disinfection
Greenhouses can be processed in a variety of ways.
Smoke bomb

The most effective treatment is sulfuric or tobacco checker. The effectiveness of the destruction of microorganisms and pests is achieved due to the release of gas during the combustion of the checker, which penetrates even into the smallest cracks.
No surface treatment is able to clean all the nooks and crannies of the structure as well as gas. The checker itself does not ignite, but smokes, processing the inside of the structure and the top layer of soil.
Processing is carried out at an air temperature of about +150C.
- Checkers are placed in the greenhouse depending on the area of their action (this indicator is always indicated on the package).
- The greenhouse is completely closed so that there are no gaps from which gas can escape.
- The saber is set on fire and exits through the doors of the structure, closing them tightly.
- You can open the greenhouse after processing with a checker no earlier than after 3 days.
- Then the structure is completely opened and ventilated.
It is not recommended to use a black checker in greenhouses where there are metal frame elements. Processing negatively affects their service life.
But checkers are great for wooden structures and do no harm. Before processing, it is recommended to place all garden equipment in an empty greenhouse: watering cans, rakes, shovels, etc., so that it is also cleaned.
For disinfection, smoke bombs are most often used:
- Fas;
- Climate;
- Hephaestus;
- Whist.
The first two checkers are black, the third is tobacco, and the last is bulk.
Bleaching powder
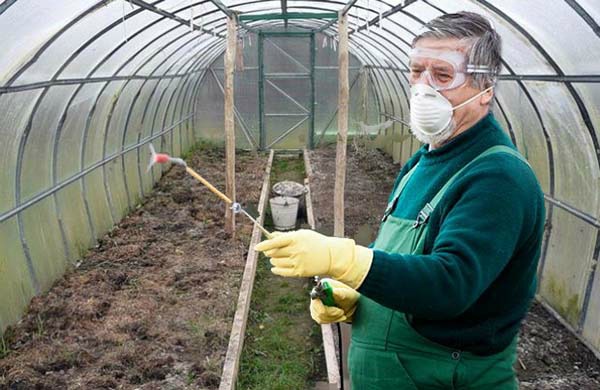
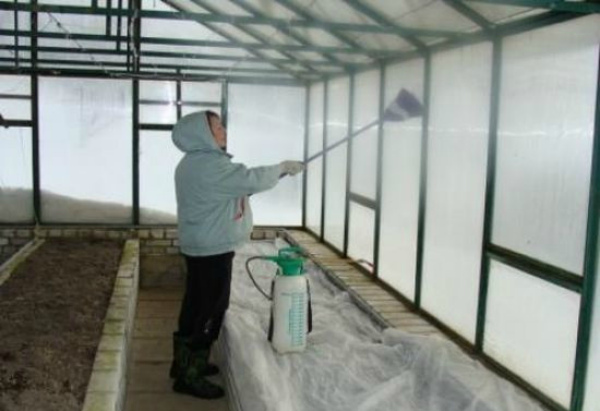
A simple and convenient way to disinfect a greenhouse is by spraying with a solution of bleach.
- To prepare a working solution, 400 g of the substance is diluted in warm water and mixed well.
- The mixture is poured into a spray bottle and the entire structure of the greenhouse is thoroughly moistened from the inside.
- The sediment remaining from the mixture is not thrown away, but is used to process wooden structural elements.
Slaked lime
Slaked lime is used to whitewash the wooden or brick base of the greenhouse and the wooden frame.
A mixture is prepared for processing: 0,5 kg of copper sulfate and 4 kg of slaked lime are added to a bucket of water. As a result, after infusion for 2 hours, a thick mixture is obtained, ready for processing.
Biological product
During the spring preparation of the greenhouse for the new season, they do not use chemical compounds, the substances of which can be absorbed by plants. It is recommended to give preference to biological products, which include only components that are harmless to plants and humans.
For the treatment of greenhouses, drugs are used:
- Bitobaxicillin – a bioinsecticide that effectively destroys spider mites, sovoksovok and other caterpillars;
- Lepitocide– a bioinsecticide that allows you to get rid of leaf-eating greenhouse pests;
- Phytocide – a high-quality fungicide that has a detrimental effect on pathogens of fungal diseases;
- Fitop-Flora-S– treatment of the structure with this drug will prevent the occurrence of more than 100 fungal diseases.
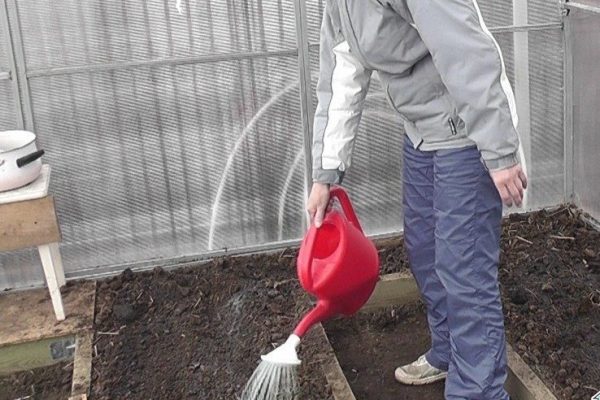
Very simple treatment of the greenhouse with a solution of potassium permanganate – video
Soil disinfection in the greenhouse
To improve soil fertility and destroy all pests, gardeners annually observe crop rotation and practice autumn cultivation of green manure in greenhouse beds.
If useful plants were not planted in the fall, and in the spring there is a need to clean the soil, you can process the soil:
- bleach, the powder is evenly scattered over the soil at the rate of 200 g/m2;
- a solution of a copper preparation (Bordeaux liquid, copper sulfate), for this a 3% solution is prepared;
- formalin – 40% formalin is diluted in a bucket of water (this amount is enough for irrigation treatment of 1 m2 area).
Soil treatment should be carried out no later than 2 weeks before planting plants in the greenhouse. The surest way to prevent diseases and pests is to completely replace the soil, but gardeners rarely resort to this method due to the high labor costs.
After disinfection of the soil, it is necessary to restore the microflora. The fact is that many drugs kill all bacteria – both beneficial and harmful.
There are biological preparations that saturate the soil with beneficial microorganisms that increase fertility. These include Baikal, Baktofit and others.
How to prepare the land for planting tomatoes
Usually, gardeners are engaged in preparatory work in the fall, but in the spring there is also the possibility of improving the structure of the greenhouse soil and forming beds.
So that you can work with the soil, you need to try to defrost it as soon as possible after the winter. To do this, it is spilled with hot water and covered with a black film. You can start working in a week.
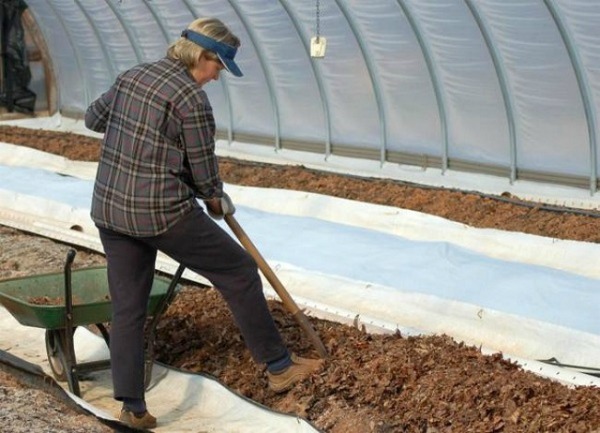
- From last year’s beds, the top layer of soil about 40 cm thick is removed, finely chopped branches are laid.
- Then the first layer is leveled with sawdust.
- Next, you can lay a layer of humus or mature compost.
- The uppermost layer is represented by fertile soil, which can be obtained by applying fertilizers and loosening components to the previously removed soil. Here you need to add sand (or vermiculite), quite a bit of high-moor peat, humus and mineral fertilizers.
- It is recommended to immediately check the acidity of the resulting composition. Tomatoes grow well with soil acidity of about 6,5 pH.
- The resulting substrate is spread on the beds and a rake forms their flat surface.
- Ash can be immediately scattered on the surface of the beds or applied directly to the hole when planting seedlings.
For those who have just installed a greenhouse and do not know how best to form beds for tomatoes in it, their optimal sizes will be of interest.
The beds are located along the long walls of the structure. Their number and dimensions directly depend on the width of the greenhouse.
- For example, in tunnel-type greenhouses (with a width of 2,5), 1 bed 100 cm wide is placed on the sides, leaving a passage of 0,5 m in the center. In this case, tomatoes are grown in 2 rows on each ridge.
- If the width of the greenhouse is greater, for example, 3 m, you can place 1 bed 45 cm wide at the edges (for planting seedlings in 1 row), and form a bed 100 cm wide in the middle of the greenhouse (two-sided planting). Thus, between the beds there will be paths of 55 cm.
Tips from seasoned gardeners
Experienced gardeners know a few tricks that will help prepare the greenhouse for the new season.
- If the winters are very snowy, it is necessary to install temporary supports in the greenhouse in the fall. Then in the spring you will not have to replace the frame elements that have bent under its weight.
- Even when using smoke bombs, washing the walls of the greenhouse should not be neglected. Moreover, they are washed on both sides – internal and external. This will help provide good light to the seedlings. Dirt and dust on the walls will shade them.
- To get rid of the whitefly, it is recommended to use formalin.
A very simple way to prepare a greenhouse in spring. Siderata. Video
Do not be upset if you failed to properly prepare the greenhouse in the fall – you can catch up on everything lost in the spring. The only problem will be self-heating of the earth, but if you take care of it ahead of time, it will not cause any difficulties.


