On the subject:
How to plant walnuts from walnuts – spring and autumn …
April 26, 2020
How to propagate cyclamen – all the ways to get new ones …
Nov 25, 2019
How to grow an orchid from a peduncle – three simple …
Nov 17, 2019
How to grow raspberry uterine root – we propagate …
October 20, 2019
BACK FORWARD 1 of 46
A little about clematis and its types
Clematis or clematis is a climbing plant belonging to the buttercup family. Despite the huge variety of species and varietal forms, all clematis bloom very abundantly and beautifully. Flowering can occur from June to the end of September. Under favorable conditions, they live for more than 20 years.
Clematis is very widespread and has about three hundred natural species. These species are very different from each other in several ways. Therefore, there is no single convenient classification of this plant.
Clematis can be herbaceous, with shoots dying off by the end of the season. These are species such as straight (C. Recta), Texas (C. Texensis) and Manchurian (C. Mandshurica).
Clematis straight


Clematis Manchu
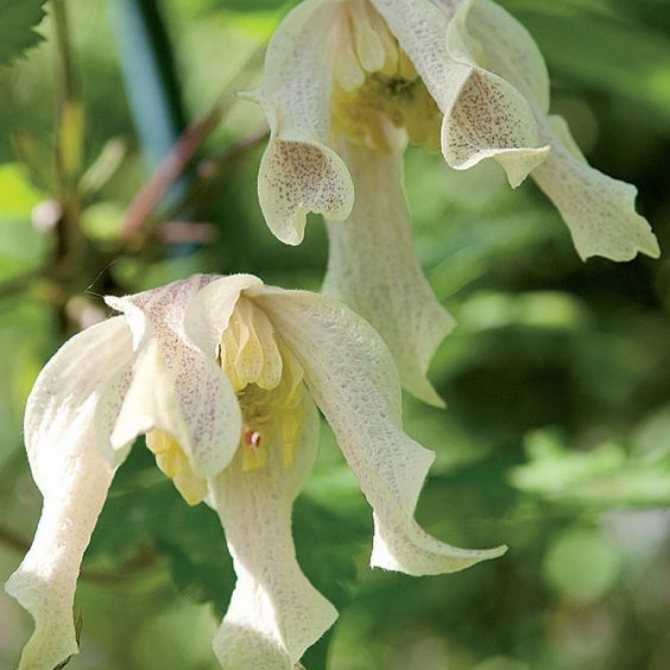
Among the clematis there are also bushes with wintering tree shoots – shrub, lobed (C. Fruticosa f. Lobata). There is an intermediate form – semi-shrubs. In this species, the lower part, like shrubs, is lignified overwintering, and the upper part, like herbaceous ones, dies off every autumn. These are hogweed (C. Heracleifolia) and whole-leaved (C. Integrifolia).

Clematis hogweed

The rest, most of the clematis, are climbing vines that cling to the support with leaf petioles. This species includes – purple (C. Viticella), Tangut (C. Tangutica), grape-leaved (C. Vitalba).

Clematis Tangut


Clematis grape-leaved
The root system, the shape and structure of the shoots are different in clematis. Their conditional classification according to the type of pruning is popular (depending on the place and time of laying the flowering buds).
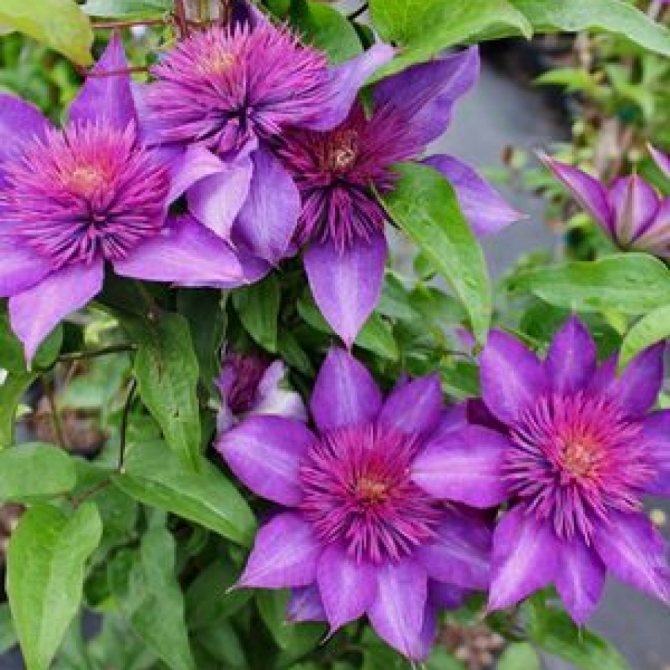
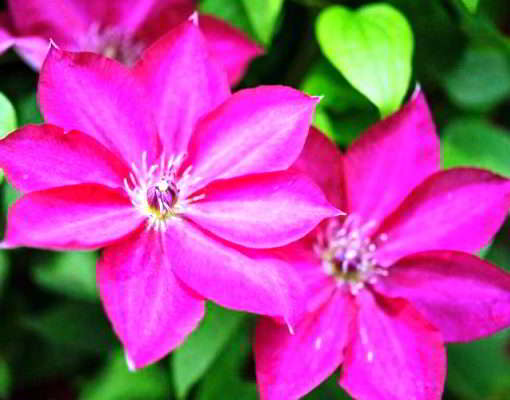
Clematis are also excellent in flower size.
Large-flowered (flower diameter over 5 cm) are subdivided into breeding groups:
– C. Jackmanii
– Viticella (C. Viticella)
– C. Lanuginosa

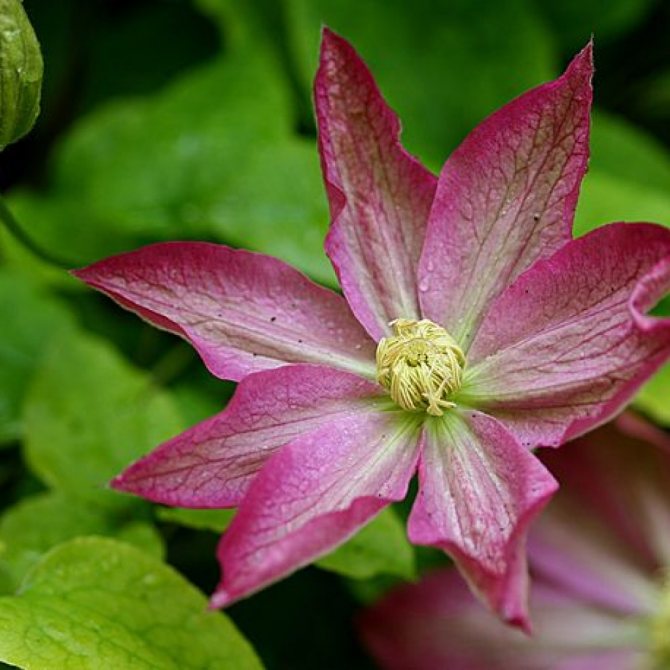
Clematis large-flowered Jacqueman

Clematis grandiflorum Lanuginoza

Clematis grandiflorum Lanuginoza
– Patens
– Florida (C. Florida)

Clematis grandiflorum Patens

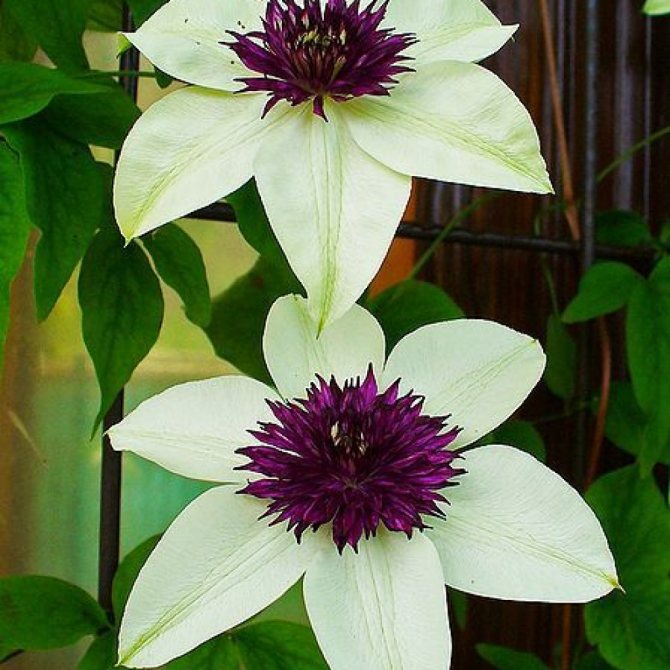
Clematis grandiflorum Florida
– Integrifolia (C. Integrifolia)
Small-flowered have a flower diameter of less than 5 cm. These include clematis such as whole-leaved (C. Integrifolia), paniculate (C. Paniculata), Tangut (C. Tanguthica), purple (C. Viticella), straight (C. Recta), burning (C. Flammula), grape-leaved (С. (C. Rehderiana), prince (Atragene) and others.

Alpine small-flowered clematis
Clematis small-flowered Manchurian Clematis small-flowered Redera
The large-flowered species certainly win hearts with their gorgeous flowers. But small-flowered, which are mostly botanical species, can be no less spectacular due to the huge number of small flowers. But, unfortunately, they are rarely seen on personal plots. Although they overwinter well, are unpretentious, successfully tolerate drought and are disease resistant. They also bloom for a long time and some of them have a pleasant smell.
And, most importantly, in small-flowered species, it is possible to successfully grow clematis from seeds without losing parental traits.
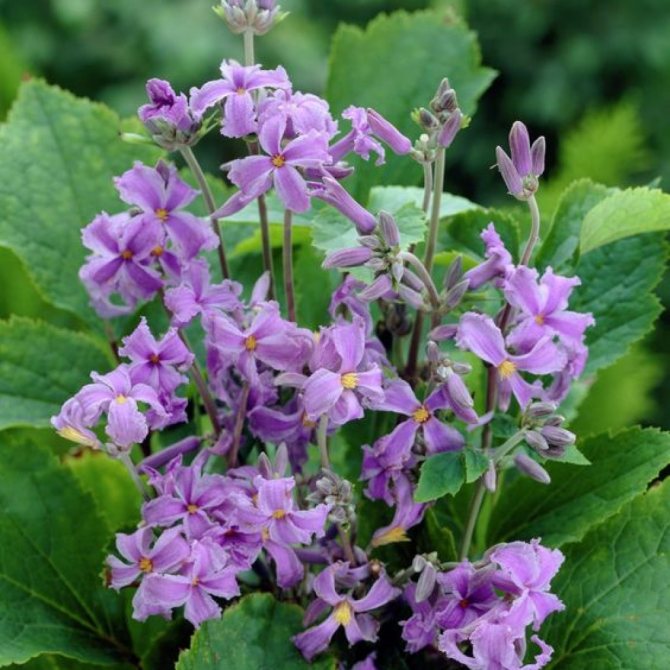
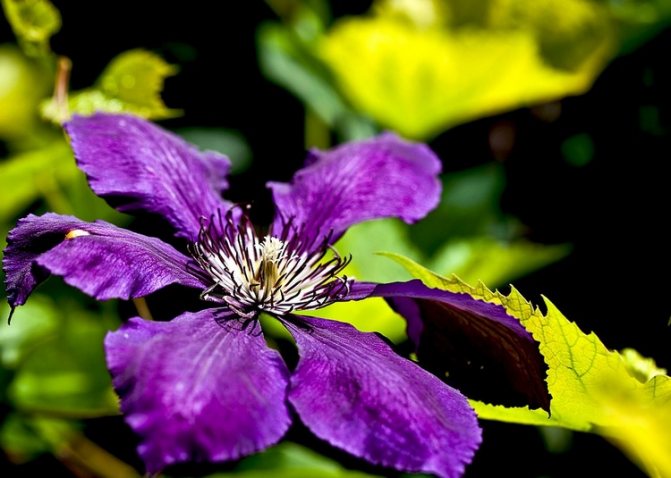
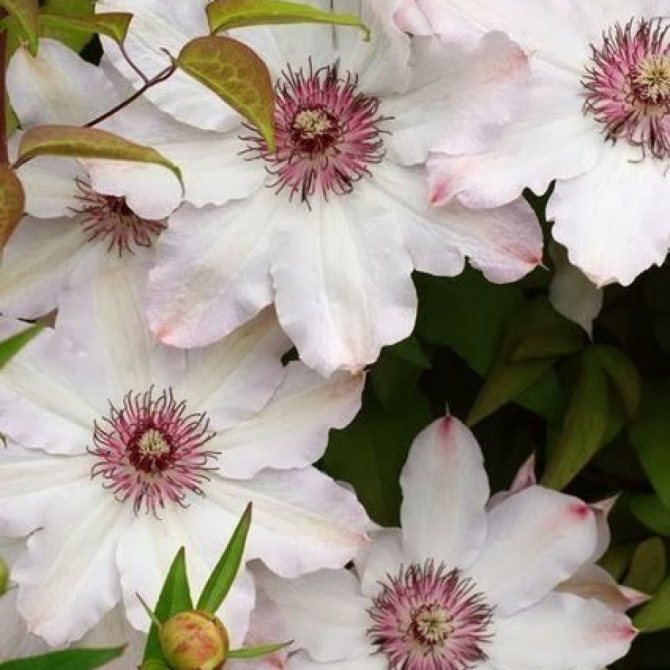
The photo shows how good all clematis are, regardless of the type and variety.
Clematis application in landscape photo
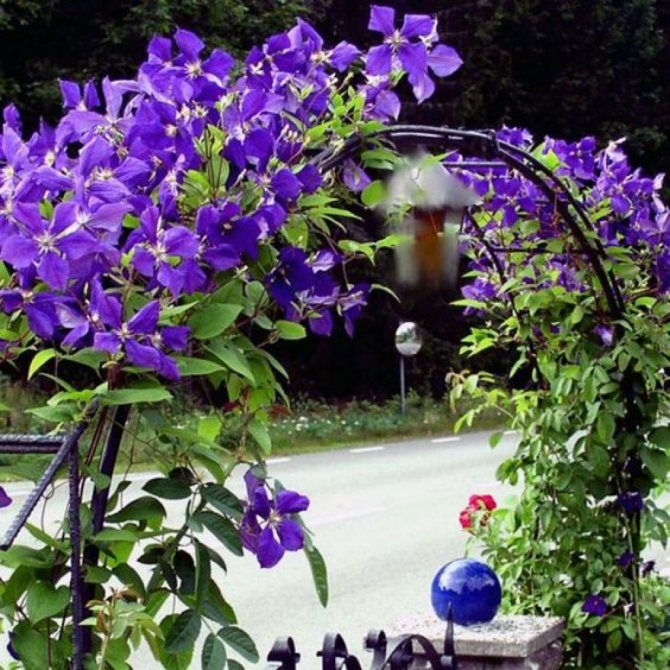
Many flower lovers know clematis as a garden liana with incomparable flowers, decorating gazebos, pergolas, fences, disguising old buildings, giving an extraordinary charm with exotic flowers:
- Frederic Chopin hybrid (light blue large single-row flowers with wavy edges of petals and creamy stamens, grows up to 3 m, blooms from June to September).
- Lady Betty Balfoe (grows 300 – 400 m, large 10 – 15 cm blue-violet flowers with white fluffing in the center of a pointed petal and white stamens, blooms profusely from July to September).
- Krakowiak (frost-hardy, unpretentious to soil and location, blooms from mid-June to September, pink flowers with a wine-red stripe, petals with a corrugated edge).
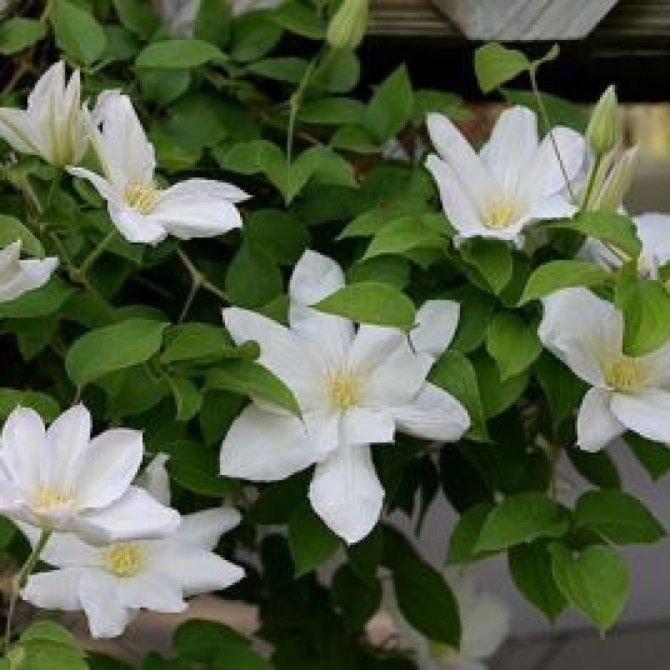
With a woody stem, clematis add beauty to microborders, can be grown in flowerpots, balcony containers:
- Violet Elizabeth – 1,5 m high, pink, double flowers, blooms 2 times (May – June on last year’s shoots, and in September blooms on newly appeared ones);
- Stefan Fanzak – bright blue with a light stripe in the center, the petals are strongly corrugated, blooms twice, grows up to 1,5 – 2 m.Snow Queen – blue-white flowers with red stamens, up to 20 cm in diameter, a rare variety, blooms continuously, long, abundantly.
- The Rooguchi variety is herbaceous, can be used as a ground cover plant, the stem grows up to 3 m, the flowers are small, bell-shaped, violet-blue with light edges.
On an alpine slide, the cultivation of the Tangut species is acceptable.
Important! Clematis are not suitable for planting on swampy soils and flooded with spring floods. The minimum volume of a pot for growing clematis on a balcony is at least 15 – 20 liters.

Methods of reproduction
Clematis, like most perennials, reproduce vegetatively (dividing the bush, cuttings, cuttings) and seeds.
Dividing the bush will be advisable after five years of plant life, if clematis has grown a lot and needs to be transplanted to a new place. To do this, in early spring, after digging a bush, it is divided into several parts. Each part should have two to three buds of growth and enough roots. The planting of the parcels is the same as that of full-fledged bushes. It is advisable, for better rooting, to water the planting hole with heteroauxin. Read more about spring clematis care here.
Cut the cuttings in June (before flowering) from a two to three year old plant. We process it with a growth stimulant and root it in water or in a special substrate. After the formation of roots (after about 30 days), we plant them in the ground. We cover well for the winter. And next year you can transplant them to the chosen place. Later cutting of cuttings is allowed, but then the plant must overwinter indoors.

Layers can be made from young shoots in June. To do this, we bend the twig to the ground, pin it, add it in, and direct the top up. You can also make horizontal layers. To do this, bend a twig into a groove 6-10 cm deep and dig in along the entire length, leaving only the top. The leaves need to be pulled out. We constantly water the layers, it is also advisable to feed them a little. They will take root by winter. It will be possible to separate them from the mother bush only after a year – next fall.
It is possible to grow clematis from seeds. However, this method is great only for small-flowered species. If you decide to propagate large-flowered clematis by seeds, then get ready to get a plant with small flowers. In hybrid forms, genetic splitting occurs and the plant loses the characteristics of the parent species.
We need to start with the selection of seeds.
It will be useful to read:
Autumn transplantation of clematis and other work Already autumn has knocked on the door. It’s time to start preparing the inhabitants of the garden for wintering. The common favorite of clematis …
Soil and watering
If you want to get clematis seedlings in early spring, it is recommended to carry out sowing seeds in special boxes… With the arrival of spring, they can be taken out into the street, and until that moment they are kept on a windowsill or loggia. You can get strong seedlings only if the boxes are filled with nutritious potting soil. To prepare it, you need to take:
Usually, after planting, the seeds germinate over a period of from 3 weeks to 3 months, which is determined by the variety used and the conditions that are maintained indoors. During this time, it is important to provide proper care: keep the soil moist, avoiding stagnant moisture.
If you have never sowed clematis seeds before, then it would be best if you choose Manchurian clematis. You can get seedlings from it with a high degree of probability, even if you do not have experience in growing these plants. Subsequently, when you get acquainted with the important nuances of growing, you can use seeds of more capricious varieties as planting material.
During sowing, it is recommended to place the seeds at a depth of 2-3 times the size of the seeds. On top of them it is recommended pour clean river sand and slightly compact the soil. The sand will help the seeds germinate much faster.
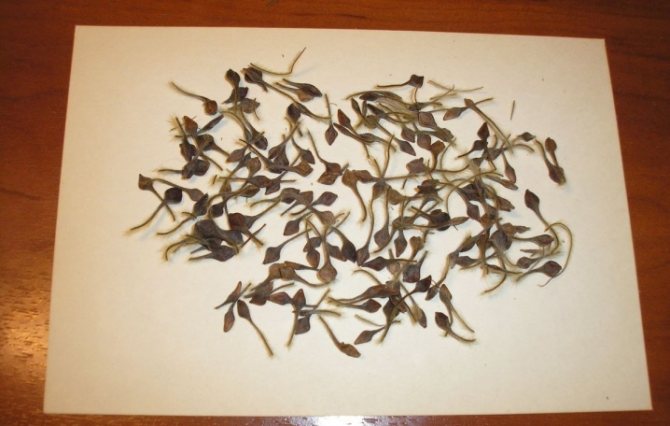
seed
Clematis seeds
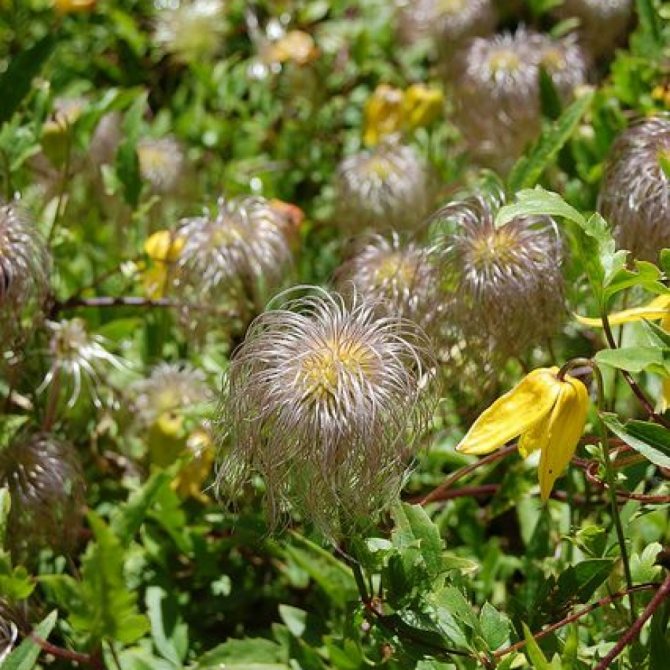
Small-flowered (species) clematis give a lot of seeds, and large-flowered (varietal) ones – very few. Seeds are small nuts-seeds, to which a fluffy “tail” is attached on a thin stem. In the fall, a fluffy silvery-white head of such tailed nuts forms in place of the flower. Inside each nut is the seed of clematis itself.
The ripening time of seeds in clematis is different, you need to collect brown seeds when the darkened fluffy head with ripe seeds crumbles when touched.
Traditionally, it is better to take fresh seeds for sowing. Therefore, when buying them in stores, pay attention to the expiration date. But if the seeds are stored correctly – in paper bags at a temperature of 19-22 degrees, then they can be usable for 4 years.
Clematis seeds, according to their size, are conventionally divided into three groups. This is important, since the timing of their germination depends on the size of the seed.
Large seeds (6 to 12 mm) have a very long germination period, which can last more than a year.
Medium seeds (3 to 6 mm) germinate in a period of one and a half months to a year.
Small seeds (1,5 to 3 mm) germinate from 1-2 weeks to 3-4 months.
Seed preparation
For the propagation of clematis by seeds to be successful, it is necessary to seriously approach the process of preparing the seed material. Every nuance is important here, so you need to strictly adhere to the rules.
- If the seeds will be bought in a specialty store, then this step can be skipped. Self-procurement of planting material is not as easy as it might seem. Procurement of seeds for different types of lianas can occur at different times of the year. Here, the individual characteristics of the plant are taken into account. Moreover, different seeds can form on the same vine. They can look different and vary in size. It is not enough to collect the seeds, they still need to be sorted correctly. The largest and most beautiful specimens are selected, which do not have the slightest flaw.
- Stratification is a mandatory step. The result of this procedure will be an increase in the germination of the seed and the formation for it of resistance to the effects of pathogens. When sowing seeds in early spring, it will be enough to provide special conditions for their storage. It should be a dark room with a temperature of about 5 degrees. When sowing in the autumn, the seeds must be kept in the refrigerator for at least 2 weeks, maximum 3. Such conditions will be as close as possible to those in which the seeds are found when they enter the soil on their own.
- Sparging also allows you to increase the germination of seed, respectively, increases the chances of success. For bubbling, it is necessary to prepare a 0,5 liter jar and fill it with a solution of baking soda (for 250 ml of water, 1 tsp of soda). We immerse the seeds in a jar and have the most common aquarium compressor. With the compressor turned on, the seeds should spend at least 6 hours. Every 6-7 hours we change the water in the jar and continue bubbling in this mode for 4 days.

These processes are the essence of preparing seeds for further manipulations. As you can see, in order to propagate clematis using seeds, you will have to work hard.
Sowing in open ground
You can sow seeds directly into open ground at the end of April. For better germination, it is advisable to sow seeds that have already passed stratification. They are distributed on moist loosened soil and sprinkled on top with coarse sand 1-1,5 cm. It is well watered by spraying. For protection from birds and direct sunlight, the sowing can be sprinkled on top with wood chips or shavings. The first shoots should appear in 20-40 days.

Freshly harvested seeds can be immediately sown in open ground in the fall, where they will naturally stratify over the winter. But in this case, germination is not always good enough. Therefore, it is better to work hard and grow seedlings.
Seed propagation by the method of 2-stage stratification
This method is mandatory for large-seeded and some small-seeded clematis (grape-leaved, serrate-leaved, etc.). Whether stratification is needed, indicate the packaging of the seeds.
- Sow the seeds as described above, keep the crops for 2 weeks at + 18 … + 20 ° C.
- Transfer to the refrigerator, the optimum temperature is + 5 … +7 ° C. Stratification lasts 1,5–2 months. Check and keep the soil always moist weekly.
After these two stages, expose the crops to light and warm – about +20 ° C. Keep watching and moisturizing, wait for the shoots.
Video: sowing clematis serrata with stratification
Seeding for seedlings
Let’s figure out step by step how to grow clematis from seeds for seedlings. Since in clematis, this is a rather complicated process.
Sowing dates will depend on the rate of seed germination. So, large and medium-sized seeds can be sown in autumn, because they germinate for a very long time. Here there is a danger of forgetting about them and leaving them without due attention. Small seeds are sown for seedlings in February-March.
You need to start by soaking the seeds for 5-7 days. The water needs to be changed constantly, several times a day. To improve germination, bubbling is carried out. For this, with the help of a conventional aquarium aerator, the water with the seeds is enriched with oxygen for 5-6 hours.
Before sowing, the seeds can also be put in a solution of any growth stimulant for half an hour. This will also promote germination.
As a container for sowing seeds, you can take a small box (wooden, plastic) or a pot 15-20 cm deep with drainage holes at the bottom. We spread a layer of broken red brick or expanded clay into it (about 5 cm). We prepare a soil mixture of sand, garden soil and peat in equal parts. It is advisable to disinfect the soil mixture before use. You can hold it in the microwave at full power for a few minutes or spill it with boiling water. The soil layer should be about 10 cm. We compact and water it well.
We simply spread small seeds with a short germination period on the soil surface and press lightly. And sprinkle seeds with a medium and long term of germination on top with a layer of coarse sand of about 1-1,5 cm. Planting frequency is 5×8 cm. On top we thoroughly spray water from a spray bottle. We cover with glass or a transparent lid.
All clematis seeds are subject to mandatory stratification. For these plants, flower growers recommend that it be carried out in two stages.
First stage. The box with the planted seeds is kept for two weeks at a temperature of 16 to 20 degrees and diffused light.
Second phase. Then we put the box in the refrigerator (temperature 4-5 degrees) for one and a half to two months. Then we germinate at a temperature of about 22-25 degrees in a bright place (but not in direct sunlight).
Be sure to make sure that the soil does not dry out, we regularly wipe off the condensate and ventilate the seedlings. After about 30 days, the first shoots should begin to hatch.
The most difficult stage – getting seedlings, is now over. We got sprouted clematis from seeds, how to grow it correctly and will successfully consider further.
How to grow clematis from seeds
Cultivation of clematis from seeds includes two stages: preparation of planting material and transplanting germinated seeds into the ground. Let us consider in more detail the features of these stages.
First of all, it is necessary to prepare an appropriate soil substrate. If we are talking about clematis, then the best option for them would be a mixture of sand with fertile soil in a ratio of 1: 2. Prepared containers are filled with soil mixture (Figure 1).

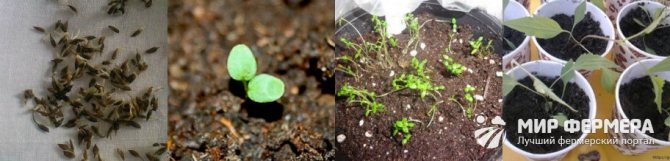
Figure 1. Stages of growing from seed
Then the seeds are sown. In this case, it is necessary to ensure that they are not too deep, as this will significantly increase the period of their germination. Therefore, simply spread the seeds over the surface of the soil, and then sprinkle them with a small layer (1-2 cm) of clean river sand or soil.
Note: If sowing is carried out in the cold season, it is recommended to keep the boxes with crops on a glassed-in balcony or on a windowsill. In spring and summer, containers can be left outside.
Remember to water your crops systematically. But remember that since they are not too deep from the surface of the soil, there is a risk of them being washed out when watering the soil. That is why it is recommended to water through the pallet, during which the seedlings will absorb exactly the amount of moisture they need. The seeded containers are kept under the conditions described until the sprouts appear. As soon as they appear, the seedlings are transplanted to a garden bed in a greenhouse or open field.
It is better to transplant, of course, in the spring months, when the threat of the return of night frosts has already passed, because the plants are still too fragile to withstand unstable weather conditions.
So, start by choosing a location. Remember that clematis prefer to grow in sunny areas, protected from gusts of wind and drafts. In addition, it would be nice to create partial shade for the root system of a flowering liana by planting ground cover annual and perennial plants around it. To carry out planting, it is necessary to mark rows at intervals of 35 cm from each other, providing in advance supports for future shoots.
Plants are planted at a short distance from each other, the soil is mulched with sawdust. In case of cold weather, the seedlings are protected by constructing a shelter made of straw or polyethylene. They take care of seedlings in the same way as for other types of seedlings: they water, loosen the soil, destroy weeds, and apply fertilizers. You should also know that in order to strengthen the root system of clematis, it is necessary to pinch the grown shoots, as well as timely remove weakened and damaged stems. Healthy vines must be tied to supports so that the stems have the opportunity to grow stronger and continue to fully develop.
Care of seedlings
As soon as the first pair of true leaves appears, the plants dive, preferably immediately into separate pots. Since the seeds germinate unevenly, the picking must be carried out especially carefully so as not to harm the neighboring sprouts.
Further care of the seedlings is usual under the same room conditions, until the cold weather has passed.
When the seedlings get stronger and there is no likelihood of night frosts, then young seedlings can be planted outside. We choose a place protected from the wind in an openwork penumbra. Since young clematis seedlings are afraid of sunburn and drafts. The soil should be light and well drained. We maintain a distance of about 20 cm between the plants. The root collar should be deepened by about 5 cm. After planting, we mulch the soil around the seedlings well using small pebbles or wood chips.

We periodically pinch the growing shoots so that they branch and the green mass grows faster.
In the future, we provide the seedlings with regular watering, remove weeds, loosen the soil and be sure to feed them.
With the onset of cold weather, young plants require good shelter. To do this, we spud them with a mixture of soil, sand and peat. We fill a slide about 20 cm high, and cover it on top with straw, dry leaves, spruce branches.
Next spring, young bushes can be planted in their chosen permanent places. They will bloom 2 years after sowing.
Home care
After planting the seeds, the container with the sown clematis seeds is kept in a room with an air temperature of 21-25 ° C in a lighted place or under a phytolamp, while it is necessary to regularly but moderately water. Typically, the germination process of seeds takes from 3 weeks to 3 months, depending on the variety and the conditions for growth.

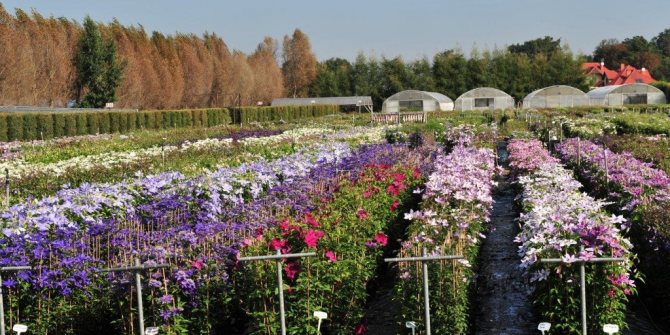
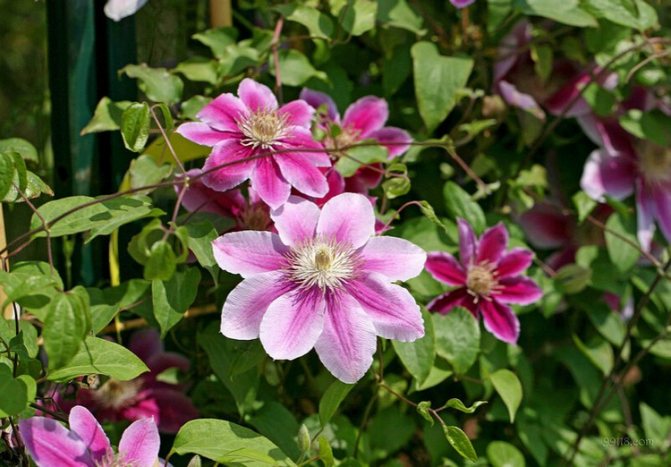
Photo of flowering clematis. Photo is used as an illustration. Source: Yandex.Images
While caring for sprouted seedlings it is necessary to observe the temperature regime and moderate soil moisture… In phase 2 of true leaves, the seedlings need to be cut into separate containers and continued with regular watering to improve the development of the root system. You can also plant seedlings in a volumetric container with a distance of 15 centimeters between plants.
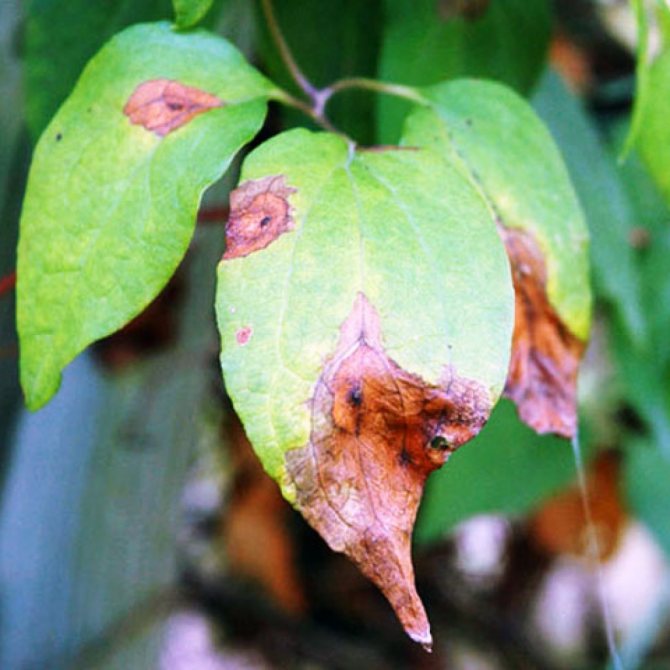
Diseases and pests
Seedlings of clematis, like any other, can get sick with such a fungal disease as “black leg”. The causative agents of this disease are in the soil, therefore, its preliminary disinfection is required. If you notice a black spot on the stem of the sprout, the plant has become weakened, then immediately remove it. The ground in the general planting should be replaced if possible and watered with Previkura solution.
Like other plants, clematis can be subject to various diseases. Their occurrence is a signal that the care for them is wrong or the growing conditions are unfavorable.
It will be useful to read:
Rust on plant leaves Basic description of the disease Rust is a disease in which fungi of the subclass Heterobasidiomycetes …
Among the diseases, it should be noted such as powdery mildew, gray rot, rust, ascochitosis, wilting (wilt) and others. In the fight against them, proper care and prevention is very important.
Pests of clematis are spider mites, aphids, gall nematodes, caterpillars of slugs, bears and mice.

Introduction (wilt)

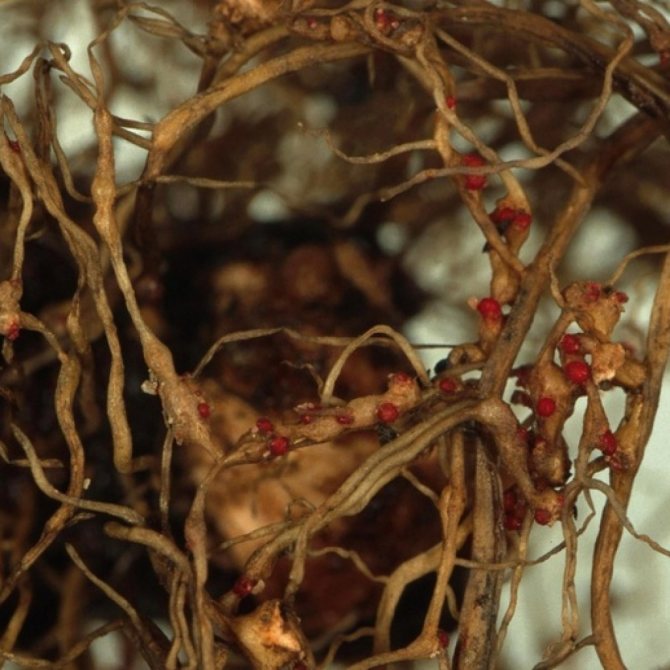
Gall nematodes
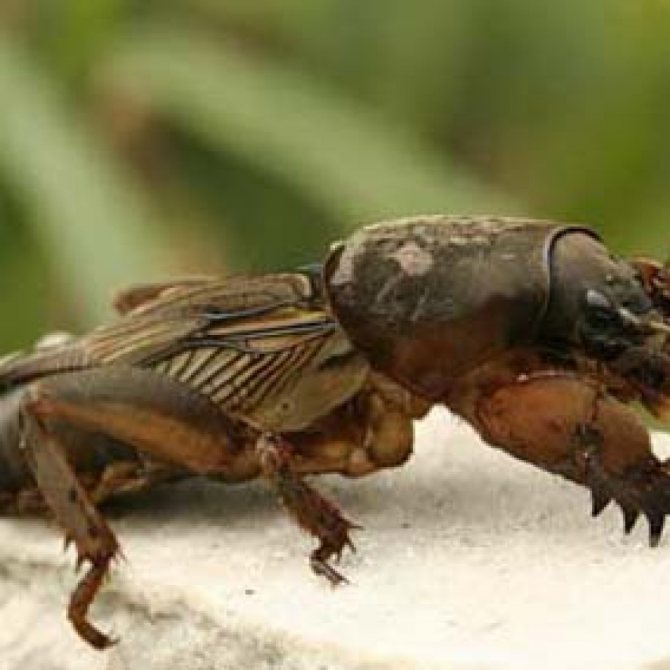

Medvedka
To combat aphids, spider mites, caterpillars and bears, insecticides should be used. But a plant damaged by gall nematodes will have to be removed, and the ground should be well treated with nematacides. Metaldehyde will help against slugs.
Little tricks
- If the winter is snowy, then seed stratification can be carried out directly in the snow. To do this, bury the box with crops in the snow (after removing the cover or glass). This is how the stratification will be most efficient.
- If not all clematis seeds have sprouted, do not rush to throw them away. Continue caring for them for another 8 months. During this time, most of the “lagging” seeds will germinate.
- Germination will speed up the manual release of large seeds from the hard shell.
- Plant dill, parsley, marigolds, or calendula around the clematis. They will provide additional protection against pests and diseases.
Since growing clematis from seeds is a rather troublesome and time-consuming business, not many will dare to do this. However, real lovers of clematis will not be afraid of difficulties. Our video will visually complement the information you received.


")
 photo, medicinal properties, application")


")


: description and cultivation (with photo)")


")


