Before you do one of the most exciting things – sowing tomato seeds, you should think about preparing the soil for filling the planting containers. Of course, you can buy a ready-made substrate and sow the seeds, but it is considered cheaper to make it yourself.
The importance of the right soil for growing seedlings
Nutritious light soil, composed according to optimal proportions, is certainly important for spitting sprouts from sown seeds and the proper development of young plants.
If you just take ordinary land from the garden and sow tomatoes in it, it is unlikely that you will be able to get healthy and strong seedlings of the crop, which will subsequently bear high fruit and produce varietal quality tomatoes.
The correct substrate affects the germination rate of seeds, their pecking together.
In heavy soils, planting material, if it rises, is quite late – the appearance of the first shoots will have to be expected for several weeks. The root system of a tomato sprout is very thin and fragile, therefore, in densely packed soil, the access of nutrients to it will be blocked. Given all these factors, the land for tomato seedlings should be light and loose.
Fertility is another important seedling substrate requirement.
For growth and development, sprouts and growing bushes need a balanced diet. They suck out the elements necessary for life from the soil with the help of lateral sucking roots.
If the soil is poor, and it contains only garden soil, the tomatoes will not receive proper nutrition. As a result, seedlings grow frail, weak and are easily affected by a variety of diseases and pests.
For the reasons listed above, before sowing tomatoes, a suitable soil is carefully prepared by introducing additional components into the garden soil that will ensure its friability and fertility.
Preparing soil for tomato seedlings at home
Experienced gardeners almost always prepare the substrate for seedlings with their own hands. This method has a number of advantages, the main of which are:
- precise control of the components introduced by the gardener himself;
- financial savings (all components of the substrate at the gardener are at hand).
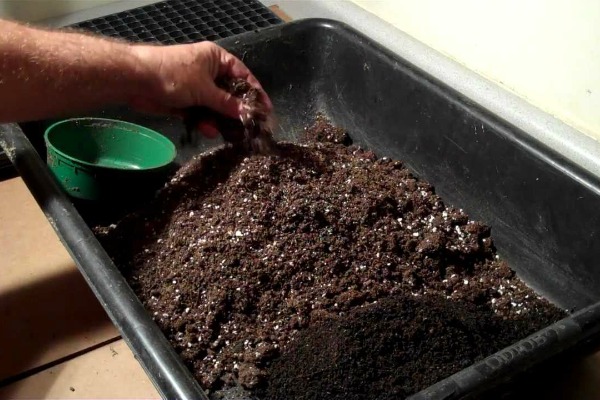
You can compose the optimal substrate for a tomato according to a simple step-by-step instruction:
- Preparation of components. To prepare the soil, you will need: river or washed sand, non-acidic riding peat, humus (can be replaced with mature sifted compost), sifted wood ash. Of course, the basis of the substrate is the earth, which can be garden, leaf, sod. Leafy soil cannot be collected under chestnuts, willows, oaks – it contains tannins that slow down the growth of seedlings.
- 1 part of earth, 1 part of sand and 1 part of peat are poured into a wide basin. The components are mixed for uniform distribution.
- To saturate the soil blank with nutrients, a solution is prepared: 25 g of superphosphate, 30 g of potassium sulfate, 10 g of urea are added to a bucket of water.
- The soil is shed with the resulting solution of mineral fertilizers.
There is another way to prepare the substrate with dry fertilization:
In this case, they do not prepare a solution, but simply add 2 matchboxes of superphosphate and 0,5 liters of wood ash to a bucket of prepared soil.
What to add to the mixture
The substrate, compiled according to the above technology, can be further enriched with a variety of components. The quality of seedlings from this will only improve.
Perlite
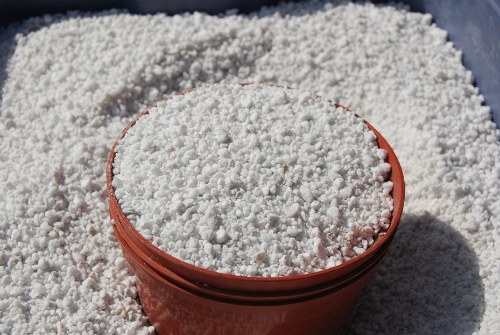
This substance of volcanic origin is used instead of sand to prepare the substrate.
- Its advantage over sand is that it is able to absorb moisture from the soil and gradually release it to plants.
- Also, the substance improves air exchange, so that the root system has improved air access.
It is poured into the soil instead of sand in the same amount – 1 part.
Vermiculite
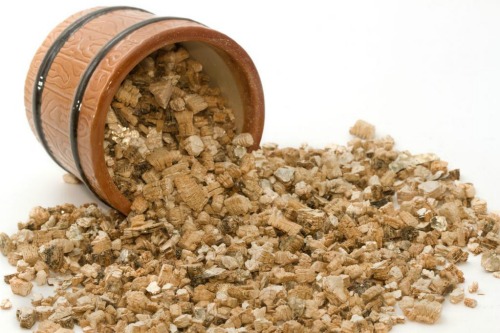
An amazing substance that contributes not only to loosening the soil, but also to the dosing of nutrients and moisture.
When vermiculite is introduced into the soil, the plants receive everything they need in optimal doses. This effect is achieved due to the special structure of the substance.
Vermiculite is a thin flake of mica that absorbs moisture and dissolved nutrients and then gradually releases them to plants.
Depending on the composition of the soil, it is poured instead of sand in a ratio of 1:6 – 1:3 so that its part is 30%.
Sapropel
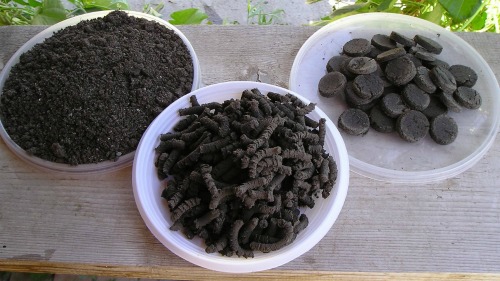
This excellent organic fertilizer is extracted from the bottom of fresh water reservoirs. The fertilizer has a black color and a crumbly structure.
Sapropel is rich in all the elements necessary for the growth of seedlings, microelements, vitamins, humic acids, and also contains natural growth stimulants.
Sapropel is mixed into the soil in a ratio of 1:3, respectively.
Biohumus
This fertilizer, like the previous one, is natural. Biohumus is a product of organic waste processing by special worms. As a result, fertilizer is obtained, purified from any infections and pests. Valued for its rich nutritional composition.
To compose the substrate, vermicompost is mixed with turf land (or peat) in a ratio of 4: 1, respectively.
What not to add
When preparing the ingredients of the mixture, it is important to be aware of those that are not suitable for growing tomatoes. The introduced components in the nutrient mixture can adversely affect the health of the bushes. They are listed below.
- Organics in the process of decay. In the process of decomposition of organic fertilizers, a huge amount of heat is released. As a result, the sown seeds will simply burn.
- clay impurities. Such impurities turn the soil into one big sticky lump in which the seedlings simply cannot grow.
- Land collected near roads and industrial plants. Such soil accumulates harmful impurities, which subsequently pass into plants.
- Land collected from the beds where tomatoes, other nightshade, peas grew.
A careful choice of components for the preparation of the substrate is the key to obtaining strong crop seedlings.
Land for seedlings with their own hands
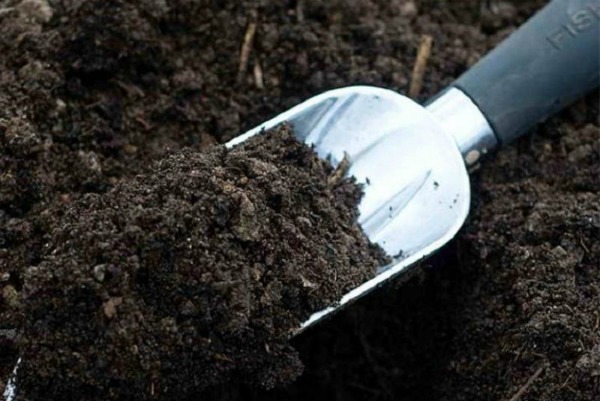
After the main work has been done, you need to make sure that the substrate has been compiled correctly and process it. Such activities include: determination of the structure of the resulting soil, disinfection and acidity testing.
The mechanical composition of the soil
According to the mechanical composition, all soils are divided into:
- sandy;
- sandy;
- loamy;
- clayey.
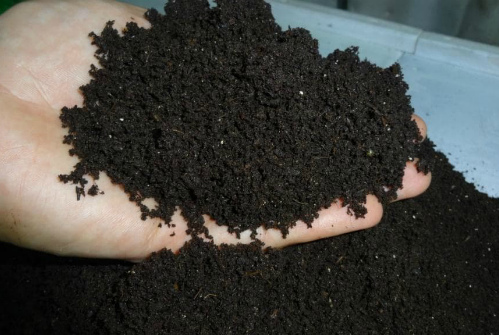
The best option for growing tomatoes is sandy loamy soil. It does not form a dry crust after watering, does not form stagnant water, and is quite moisture-intensive.
In order to check whether such a soil turned out with self-compilation, you need to take a little important substrate in your hand, roll it into a sausage. Sandy loamy soil cannot be rolled up, it crumbles.
If you managed to get a sausage, you need to try to roll it into a ring. If the ring does not crack, then the soil is clayey, it cracks a little – heavy loam, it cracks heavily – medium loam, it breaks – light loam.
In any case, such soil is not suitable for seedlings; you will have to prepare it again and monitor the absence of clay impurities.
Soil disinfection
Since the substrate prepared independently may contain pathogens of tomato diseases, it is necessary to carry out its major disinfection.
You can disinfect the soil in any of three ways:
- Freezing. A sharp change in temperature kills all harmful microorganisms contained in the soil. To do this, it is exposed to frost for several days, then brought home and allowed to thaw in the warmth. This will provoke the awakening of harmful organisms. The soil is again taken out into the street. In order for the treatment to be effective, these steps are repeated several times.
- Heat treatment. There are two options for disinfection: calcination and steaming. In the first case, the soil is heated in an oven at a temperature of 800C. Processing time – 30 min. In the second case, the soil is folded into a rag bag and steamed in a water bath for 10 minutes.
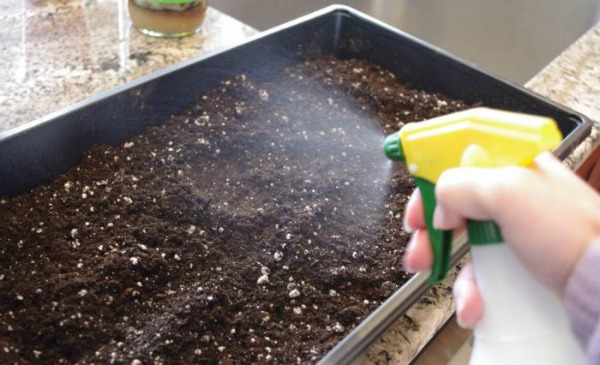
- Etching. Here disinfection is carried out with the help of special preparations. You can use a rich pink solution of potassium permanganate or special fungicides and insecticides to spill the soil.
So that the soil after processing does not stick together and becomes crumbly, it is dried, laying out a thin layer on newspapers.
How to test soil acidity
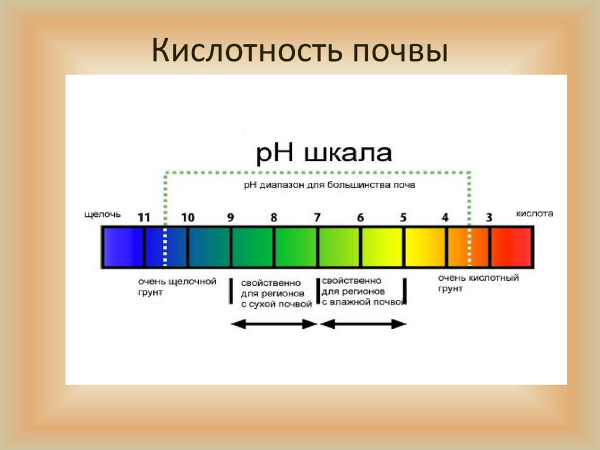
The level of acidity is an important soil indicator that affects the growth of tomatoes. If the soil is acidic, or vice versa, alkalized, seedlings develop various diseases that lead to death. For tomatoes, the soil pH should be close to neutral and be 6,2 … 6,8.
You can determine the level of soil acidity yourself at home, using a variety of methods.
Litmus paper
You can buy this acidity meter at a pharmacy or gardening store. For measurement, you will also need distilled water.
A handful of soil is added to a small amount of liquid, mixed and waited for 15 minutes. Then mix again and after 5 minutes you can start measuring.
Litmus paper is coated with a special color-changing agent.
- If it turns red, orange or yellow upon contact with the resulting solution, then the soil is acidified.
- If the color has changed to a faint green, the pH is neutral.
- The bright green color of the paper indicates that the soil is alkaline.
According to the same principle, measurements can be made with the Alyamovsky device.
Vinegar
It is enough to pour a small handful of soil with vinegar and evaluate the reaction:
- When in contact with lime, carbon dioxide is formed, so if the soil is normal, bubbles will appear.
- When conducting an experiment with an acidic substrate, there will be no reaction.
Grape juice
You need to pour grape juice into a glass and add a little earth. If the color of the liquid changes, and bubbles form on the surface for a long time, then the acid-base balance is normal.
Chalk
5 tablespoons are poured into the bottle. water at room temperature, add 2 tbsp. soil and 1 tsp. crushed chalk. A fingertip is placed on top of the bottle. Air is bled out first.
- If the soil is acidic, the fingertip will straighten out, if it rises a little, the soil is slightly acidic.
- If there is no reaction, then the soil is not acidic.
currant leaf
A few leaves of blackcurrant are plucked from a bush, poured with a glass of boiling water and allowed to brew. Then they fill up a handful of earth and evaluate the color of the liquid.
If it’s dyed:
- in red, then the soil is acidic;
- in pink – slightly acidic;
- in blue – alkaline;
- in green – neutral.
Weeds
If the soil for seedlings is taken from the site, you need to see which weeds grow nearby. On soil suitable for growing tomatoes, coltsfoot, clover, field bindweed, nettle often grow.
The soil on which horsetail, horse sorrel, plantain, pansies grow cannot be taken – its acidity is too high.
It cannot be said that all methods are equally accurate. Folk methods of verification (Vinegar, grape juice, chalk, currant leaf) may give inaccurate results.
How to find out the acidity of the soil – video
Ready soil for seedlings
There are a lot of manufacturers of soil for tomato seedlings. Before buying, you need to familiarize yourself with the composition of the soil and check whether it is enriched with mineral fertilizers. If not, you will have to make them yourself.
Ready-made substrates significantly save the gardener’s time spent on compiling the soil mixture, however, their purchase can cost a pretty penny, especially if the area allotted for tomatoes on the site is large. To plant it, you need to grow a lot of seedlings with a margin. Considering not only the consumption of soil for sowing, but also for picking, the purchase price can be really high.
Preparing the land for seedlings of tomatoes – video
Even a beginner can compose soil for tomato seedlings, the main thing is to take into account a few simple requirements for its composition and structure. Careful selection of the components of the mixture will save money and grow strong healthy seedlings.


