On the subject:
Chestnut tincture – medicinal properties and …
April 12, 2020
How to cook chestnuts in the microwave – quickly, …
August 3, 2019
Can chestnuts be eaten raw and which ones?
July 14, 2019
Toothed chestnut – edible, beautiful and unpretentious …
April 9, 2019
BACK FORWARD 1 of 4
Chestnut varieties
There are about ten main varieties of chestnuts. They are divided into two large groups: horse chestnut and real chestnut (stomach). The fruits of the first varieties are famous for their medicinal properties and are often used in the preparation of pharmaceutical preparations and for recipes of traditional medicine. Extracts and infusion of horse chestnut are effective in the prevention and treatment of thrombosis and thrombophlebitis, as well as diseases of the venous system.
The fruits of a real chestnut, although less healing, are quite edible, and in some countries they are considered a delicacy. Growing this type of tree in our conditions is more problematic, so it is better to learn more about the rules for planting horse chestnut.
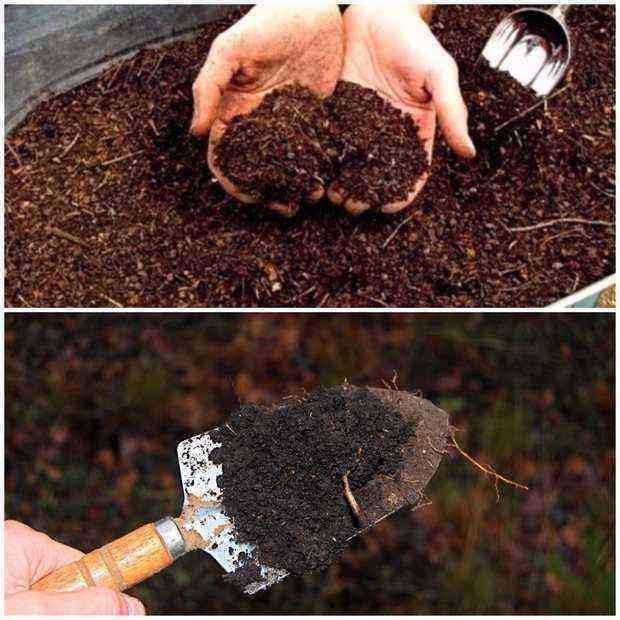
Soil preparation
Planting chestnuts, like any gardening work, requires knowledge of the basic requirements of the culture. These trees look equally good in single and group plantings, decorating any landscape. At home, chestnuts are usually planted as a free-standing tree, because for its comfortable growth it is necessary to leave a lot of free space: about five meters on each side. If a group planting of chestnuts is carried out, the distance between the trees should be three meters or more.
You should also consider other cultural requirements:
- The landing site must be sunny. In the shade, flowering may not be as abundant and long-lasting.
- The tree tolerates cold well, but it is better to protect it from strong drafts.
- The soil is preferable to be neutral or slightly acidic.
- The soil at the planting site should be sufficiently loose, with mandatory drainage. Stagnant water for chestnut roots is fatal.
- Too dense soil is diluted with sand; a little clay can be added to loose soil. It will retain moisture and promote normal root development.
You may be interested in: How to plant walnut chestnuts in your area
Planting chestnuts is best done in early spring or mid-autumn. Planting is carried out in two ways: seedling and seed. It is necessary to choose the preferred option individually, both of them give almost one hundred percent survival rate.

How to deal with pests
A young tree is constantly exposed to various diseases. The main ones are:
- mole;
- powdery mildew;
- mite.
To avoid them, prophylaxis is carried out every two weeks. For this, special means are recommended. They are not harmful to plants and bees. Gardeners recommend choosing non-toxic options.
Usually the chestnut tree suffers from miner moths, tree mites and powdery mildew. From moths, the seedling instantly loses its leaves in the middle of summer. In the autumn, new shoots appear. As a result, the plant weakens and is difficult to tolerate frost. To combat such pests, a special chemical is required. For example, Lufox 105 EC helps to neutralize pests at all stages. It is important to collect all fallen leaves and burn them, as the pests will spread to healthy parts. Larvae can be deposited in them.
Sometimes fungal pathologies appear. For example, powdery mildew. In this case, a whitish bloom appears on the leaves. Then they quickly turn yellow and fall off. To get rid of this, they use fungicides. They can also treat a healthy seedling for preventive purposes. And to prevent tree mites, they use karbofos every 14 days. After 10 years, the tree no longer needs increased care. The plant is able to protect itself from pests on its own. In addition, it tolerates both frost and drought well.
Popular: Variety of shapes and colors Calathea from the Marantov family
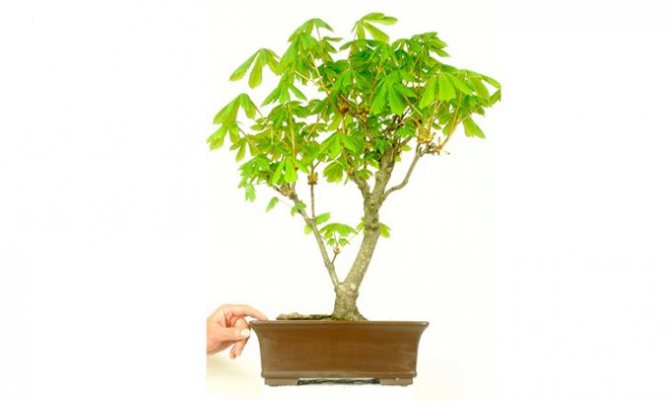

Planting a chestnut seedling
Planting a chestnut seedling is carried out in spring or autumn. Spring time is more preferable, because before the winter cold begins, the tree will get strong enough and take root in a new place. To do this, it is advisable to select sprouts two to three years old, without visible damage to the bark and a deformed trunk. Chestnuts can be transplanted up to the age of ten, but a more mature plant will not take root with an autumn planting.
Landing algorithm:
- It is necessary to dig a sufficiently spacious hole, 50 × 50 cm in size.
- A layer of sand is poured at the bottom of the pit, which performs a drainage function. On too dense soils, pebbles or crushed stone mixed with sand can be used.
- Then a seedling is placed in the hole. To form a smooth, beautiful trunk, a peg is driven in at the same stage. It will serve as a support in the first three to four years of growth, so it must be placed at a distance of at least 15 to 20 centimeters from the trunk.
- The hole is covered with soil mixed with a bucket of humus. For additional feeding, half a kilo of dolomite flour and lime are added to the mixture.
When burying a seedling, it is necessary to ensure that the root neck rises above the surface by 8 – 10 centimeters. It is necessary to make a small embankment around the stem, because over time, the earth in this place will sag slightly. After planting, water the seedling with warm water.
Planting chestnut seeds
A horse chestnut tree that has fallen from a tree can be used to grow a tree. In this case, the fruits have already reached technical ripeness and are suitable for further reproduction. Further information will tell you how to plant a chestnut in a dacha from seed.
You may be interested in: How to plant walnut chestnuts in your area

The main subtleties of such a landing:
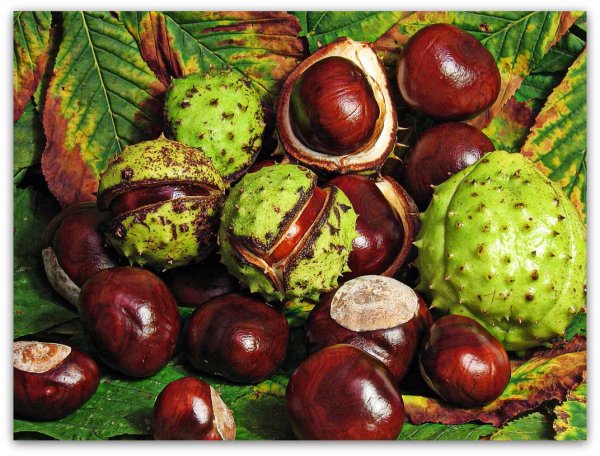
- For planting, only large and ripe chestnuts are suitable, which are ripe enough and fell out of the seed box on their own.
- The fruits must be stratified. For this, selected seeds are placed in a cardboard box, and the box itself is placed in a dark, cool place for two weeks. A cellar or refrigerator will do.
- Natural stratification of seeds in the conditions of “wild” growth takes place during the wintering of seeds under the leaves, so you can use the planting material collected in spring.
- After stratification, the chestnuts must be soaked in warm water for 5 days. This is done so that the peel softens a little and the sprouts peck faster. The water must be changed every day so that harmful microorganisms do not multiply in it.
- Seeds are embedded in pre-prepared soil to a depth of 10 centimeters. The distance between plantings should be at least 20 centimeters. In the future, thickened plantings are thinned out, leaving the strongest specimens.
- After seeding the seeds, the top layer is mulched with dry leaves, grass or humus.
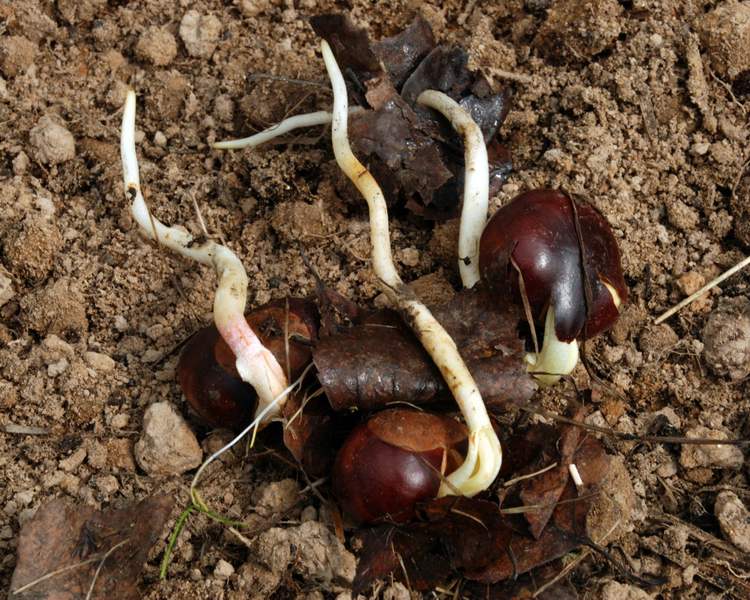
- The first shoots may appear in two weeks.
Autumn planting of seeds is less preferable, because rodents readily eat chestnuts. In the spring, no one is safe from this scourge either, but due to the appearance of other food, the seeds are less dangerous.
The germination of edible chestnut seeds can be seen in the attached video.
Germination of seeds

In order for the seeds to germinate, stratification is required – they must be kept at a low temperature for several months. This can be done in natural conditions. Then the procedure comes down to planting chestnuts in the fall in open ground, which will need to be covered with a layer of mulch. Alternatively, you can submerge them under the snow cover. But in both cases, the possibility of damage to seeds by rodents cannot be ruled out.
Therefore, it is better to give preference to artificial stratification. This method has several advantages:
- the percentage of germination increases to 95%;
- seedlings develop faster;
- strong seedlings are formed by the end of May;
- plants of the first year of life are quite ready for winter frosts.
The best varieties of pears: names and descriptions
After collecting the seeds, until the onset of cold weather, they are stored in a fabric bag in a cool place, for example, on the balcony. When the outside temperature drops to freezing, the chestnuts are loaded into a container with a lid, filled with slightly damp sand and closed. Packaged seed should be stored in a basement or refrigerator for 2-5 months. The temperature here should not drop below + 5º.
About a week before planting, the nuts are removed from the sand and immersed in a container with heated water for 5-7 days. The fluid is changed periodically. Soaking will soften the dense chestnut rind and increase the chance of nut sprouting.
The chestnuts can then be planted in pots. Any loose soil is suitable for this (it can be mixed halfway with sand). The nuts are sealed to a depth of about 5 cm, after which they are watered and placed on the windowsill. The earth is moistened as it dries. The first shoots usually appear in 2-3 weeks, but sometimes you have to wait about two months. Therefore, if the plant is planned to be planted in the yard this spring, then germination should be started at the end of February, not later.
Planting chestnuts in the garden in autumn is carried out in September – October. Immediately after collecting ripe fruits, they are planted in loosened ground at a distance of 20 cm from each other. The recommended planting depth is 5 cm. If you bury them deeper, they may not ascend. More shallow immersion can cause drying or freezing of seeds. The beds are leveled and watered, then insulated with fallen leaves, sawdust or straw. At this, the germination work can be considered completed. Seedlings will appear in the spring.
But you don’t have to bother at all. There must be a chestnut alley somewhere nearby. Under mature trees, it is easy to find young growth. It is she who can be used as a “seedling”. It will be enough to carefully dig up a young tree and transfer it to the desired location.
Further care of the tree
Chestnuts are unpretentious and practically do not require the participation of gardeners. At the same time, in order to form a beautiful spreading crown, it is advisable to carry out annual pruning, and for normal growth and fruiting, it will be useful to learn the rules of feeding.
Care nuances:
- Watering is needed regularly, but not excessive. In the first three to four years, further growth depends on this, but then this criterion is not so important, because thanks to the voluminous root system, the chestnut finds moisture on its own.
- Top dressing is carried out once a year in early spring. To do this, you can prepare a nutrient mixture consisting of 15 liters of water, a kilogram of fresh manure, 25 grams of phosphorus – potassium fertilizers and 20 grams of ammonium nitrate and urea. Pour the resulting mixture into the mulched root zone little by little, so as not to burn the roots.
- As a uniform application of fertilizers, mulching of the root area with humus and rotted manure is used.
- Forming pruning is carried out in the spring, while young shoots are shortened by about a quarter of their length. Despite the fact that the chestnut crown is notable for its splendor, it also needs to be thinned out in order to prevent strong thickening. In this case, there is a high probability of being affected by fungal diseases, as well as the loss of an attractive appearance.
- Young shoots need winter shelter. To do this, three or four pegs are driven around the tree, onto which a tarp or other durable fabric is wrapped. It is impractical to use plastic wrap, because this can lead to decay of shoots and the development of fungal diseases.
You may be interested in: How to plant walnut chestnuts in your area

Planting and growing chestnuts at home is not difficult, because it is a very hardy and persistent tree. For this, ready-made seedlings or self-collected planting material are suitable. The main nuances of planting, as well as the rules for further care, are highlighted in the information of our article.
Features
The chestnut, familiar to everyone, which everyone has seen at least once in their life in a park, on alleys or near a road, is not suitable for eating. In order to properly grow edible fruits, you first need to understand the structural features.
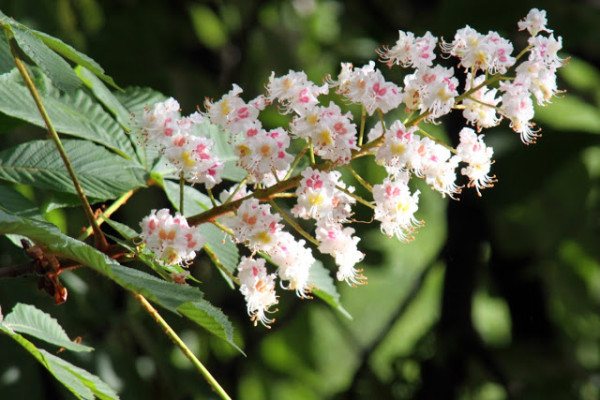
The height of one tree ranges from 1 to 35 meters. The indicator directly depends on the selected type of wood. The flowering period lasts from May to June. At this time, the plants are decorated with unusual inflorescences that have the shape of a pyramid.
After flowering, fruits are formed. They are protected from adverse external conditions by a shell on which small thorns are located. Usually the peel hides from 1 to 3 nuts in its bowels.
Reference!
The tree has a fairly dense crown. Therefore, it creates a good shadow. In addition, the plant has a well-developed root system.
Other plants are simply not able to survive next to such a neighbor. Therefore, it is best to place several benches under the chestnut tree, as a result of which there will be a cozy resting place, which will act as a saving oasis from the summer heat and a little rain.


")


")


