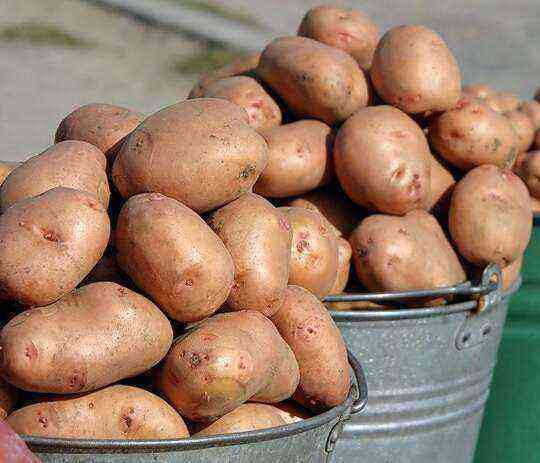
By Russian standards, arable land in the Netherlands is scarce, and even that is half reclaimed from the sea. Nevertheless, Dutch farmers have managed to achieve such potato yields that their technologies have become benchmarks throughout Europe. About 25% of all agricultural land in the country is allocated for growing potatoes. At least 40-45 tons of selected tubers are harvested from one hectare, which is almost twice the standard yield in Russia. Many developments can be used even by summer residents.
Growing potatoes using Dutch technology is a strictly regulated process in which attention is paid to every detail. Using this technique, it is quite possible to collect 250-300 kilograms of potatoes from a hundred square meters on an ordinary personal plot.
Choosing a potato variety
Scientists advise periodically, at least once every three to four years, to completely renew the potato variety. The fact is that this root crop is susceptible to various diseases, and if you constantly use only tubers grown on your own plot, the yield will decrease over time.
Each gardener decides for himself which variety to give preference to. Recently, Dutch varieties are very popular: they are disease resistant and give a high yield. But they are not suitable for every area.
In the northern regions, it is best to plant potatoes of domestic zoned varieties. Practice shows that when using the Dutch method, their yield is no worse than imported ones. And since it is not in our power to abolish the vagaries of the weather, it would be very prudent to plant early and late potatoes in the same area.
Of the Dutch varieties in Russia, they have proven themselves well:
- Impala is an early ripening variety that is suitable both for the middle lane and for Siberia. The tubers ripen in 50 days. In the southern regions, two harvests per summer are possible;
- Red Scarlett is an early variety with red tubers. Inside, the potatoes are snow-white, they do not darken either when heated or when mechanically damaged;
- Prior is an early variety resistant to nematodes, viral diseases and late blight;
- Cleopatra is an early variety, quite unpretentious, can grow on clay and sandy soils. However, it often suffers from scab;
- Jarla is an unpretentious early variety that can be planted on any, even the most depleted soils;
- Mona Lisa is a mid-early variety, one of the most resistant to various diseases. Productivity – up to two kilograms from one bush;
- Frisia is a mid-season variety that is resistant to viral diseases;
- Eba is a medium late variety, resistant to viral diseases. The tubers are yellow;
- Asterix is a medium late variety. The tubers are well preserved until spring.
The most popular domestic varieties:
- Nevsky is one of the most productive and disease-resistant mid-early varieties. The only drawback is that the tubers must be stored at a temperature close to 0 ° C, otherwise they germinate too quickly;
- Zhukovsky early – early ripening variety, resistant to all diseases. It has a great taste, but does not boil over due to the fact that the tubers contain little starch. Productivity – up to 600 kg per one hundred square meters;
- Luck is an early ripening variety that is resistant to all diseases and mechanical damage. Tubers are yellow with tasty white pulp;
- Peter’s Riddle is the most common variety in the Northwest region. Productivity – up to 300 kg per one hundred square meters. The tubers are pink, with a creamy pink, tasty pulp. They are excellently preserved until spring;
- Zdabytak is a late variety, resistant to diseases. Tubers contain a lot of starch.
Seed preparation
As a planting material, you should choose intact tubers with a diameter of 3-5 cm, preferably varietal, not lower than the second reproduction. Smaller tubers cannot be used: the potato shoots will be too weak. It is advisable to plant tubers that are too large only if they are their own seeds. Each potato must have at least five eyes.
About a month before planting the tubers, one of the methods should be germinated. The Dutch plant potatoes when the shoots reach a height of 0,5 cm, but this is due to the peculiarities of mechanized planting: long shoots break.
In our climate, it is very important to choose the right time for planting potatoes. In no case should you rush, otherwise the seedlings may die from frost. Therefore, when planting manually, the potatoes are germinated until the sprouts reach a height of 2,5-3 cm.To prevent them from breaking, the tubers are carefully folded into plastic bags with handles when the height of the shoots does not exceed 0,5 cm. transport to the landing site.
Germination rejects diseased tubers and speeds up ripening time
Soil preparation
If you plant potatoes in the same place every year, the soil will quickly deplete and the tubers will begin to become infected with various viruses. The best results can be obtained by planting potatoes in the same spot once every three years.
Of course, the frequency of planting potatoes depends on the size of the plot: if possible, you need to give the land a rest and only mow the weeds, preventing them from scattering around the garden. At the beginning of autumn, before planting, you can treat the weeds with the Roundup herbicide: from this drug they will die within 3-4 weeks and begin to decompose.
If such a crop rotation is impossible due to the fact that the plot is small, it is necessary to ensure at least an alternation of crops. Potatoes are best planted where rye, oats or legumes previously grew. It makes sense to sow the area with oats in the fall, and to dig it up in the spring.
Before planting potatoes, the gardener must decide which fertilization and pest control methods he prefers: organic or mixed. Dutch farmers use a lot of mineral fertilizers and herbicides, but in the conditions of a regular garden plot, you can get by mainly with organic fertilizers.
The flat area should be fertilized in the fall or spring before planting. In autumn, the plot is dug up or shallowly (to a depth of 22-27 cm) plowed with a reversible plow, then fertilized with humus or compost. You can also add a little superphosphate, potassium chloride and some kind of fertilizer containing nitrogen. If the site is located on a slope, then in the fall it is better not to dig it up and fertilize it, so that the spring waters simply do not wash away all the useful substances.
Dutch potato planting scheme
To a person who first encounters this technique, it seems that too much space is wasted in vain: only about 1-6 tubers are planted per 8 square meter. But the thrifty Dutch have calculated everything: as a result, sprawling bushes with a powerful root system grow, and the yield is higher than with the traditional method of planting.
Dutch potato planting technology provides the tuber:
- maximum amount of heat;
- air (aeration, “airing” the roots);
- top dressing.
Algorithm for planting and processing potatoes:
1. The soil for potatoes is loosened by hand, using a shovel and a rake, or with a cultivator. All weeds must be removed. The distance between the rows should be about 75 cm, between the bushes in a row – 30 cm.The depth of the hole is 6-8 cm.
Advantages of long distances between bushes:
- the soil for hilling is taken from the aisles, so the tubers are above their level. The ridges are warmed up by the sun, the roots breathe freely.
- the cross-sectional area of the ridge is 1200-1500 cm². This volume is enough to feed the bush;
- in a rainy summer, the bushes do not get wet, since water flows into the aisles;
- during a drought, enough water remains in the ridge so that the plant does not wither before watering or until it rains.
2. Fertilizers are placed in each hole so that they are above the tuber. Rotted manure or humus can be used as fertilizers. If there is no manure, then in small quantities it is permissible to use old (older than a year) chicken manure.
3. Potatoes are very fond of ash and crushed eggshells. Ash needs about 100 grams per well, eggshell – a handful. A little onion husk will keep the tuber free from slugs and wireworms.
4. Tubers are placed in the holes with sprouts up and covered with earth.
5. In 4-6 days the appearance of the first, inconspicuous weeds is possible. They should be weeded out before they are overgrown. Wheatgrass and sow thistle should be carefully removed. It is convenient to do this with a cultivator.
6. When shoots appear, they are huddled so that the height of the ridges is 10 cm. If there is a risk of frost, young shoots can be sprinkled with earth (the tall ones are bent down). When the threat of frost has passed, the plants must be lifted and sprayed with water from a watering can.
7. Approximately two weeks after planting, the soil around the seedlings is carefully weeded and scooped up from the row-spacing so that the height of the ridges is about 25 cm, the width at the base is 75 cm, and the width at the top is 30 cm.
8. When Colorado potato beetles appear, the seedlings are treated with a pest control agent. If there is no rain, the potatoes are watered one to three times per season (once or twice before flowering, once after).
 Productivity – 250-300 kg of potatoes per hundred square meters
Dutch technology potatoes can be grown both in personal plots and in the fields. The only difference is that in the first case, all operations are performed manually, in the second – with the help of technology.


")


